Introduction: The Spark That Lit My Outdoor Oasis
When I first started thinking about transforming my garden, I knew I wanted it to be more than just a space to admire during the day. I envisioned a serene and inviting atmosphere that would draw me outside even after the sun had set. The key to making this dream a reality was finding the perfect outdoor lighting. What I didn’t anticipate was how much thought and consideration would go into choosing the right outdoor lights for my garden. It wasn’t just about placing a few lights here and there; it was about creating an ambiance that would enhance my outdoor space and make it functional, safe, and beautiful after dark.
As I delved into the world of garden lighting, I learned that selecting the perfect lights involved more than just picking out fixtures. It required understanding the different types of lights, considering the layout of my garden, thinking about the mood I wanted to create, and making practical decisions about power sources and energy efficiency. I’m excited to share my journey and insights with you, so you can make informed choices when lighting up your own garden.
Step 1: Understanding the Purpose of Outdoor Lighting
Before I even started shopping for lights, I had to clarify why I wanted outdoor lighting in the first place. For me, it was a mix of aesthetics, functionality, and safety. I wanted to create a warm, inviting atmosphere that would make my garden a place to relax in the evening. At the same time, I needed to ensure that the paths and walkways were well-lit for safety reasons, and I wanted to highlight certain features in my garden, like my favorite flower beds and a small fountain.
It became clear that outdoor lighting can serve multiple purposes:
- Ambiance: Soft, warm lights create a cozy atmosphere perfect for evening relaxation or entertaining guests.
- Functionality: Bright, focused lights are essential for lighting up pathways, driveways, and entryways, ensuring safe navigation after dark.
- Security: Motion-sensor lights and floodlights can deter intruders by illuminating dark areas around your property.
- Highlighting Features: Accent lighting can draw attention to specific garden elements, like trees, sculptures, or water features.
By identifying the primary purposes for my garden lighting, I was able to narrow down my options and focus on lights that would meet my needs.
Step 2: Exploring Different Types of Garden Lights
Once I had a clear idea of what I wanted to achieve with my outdoor lighting, it was time to explore the different types of lights available. I quickly realized that there are many options, each with its own strengths and ideal uses.
Here’s a breakdown of the types of garden lights I considered:
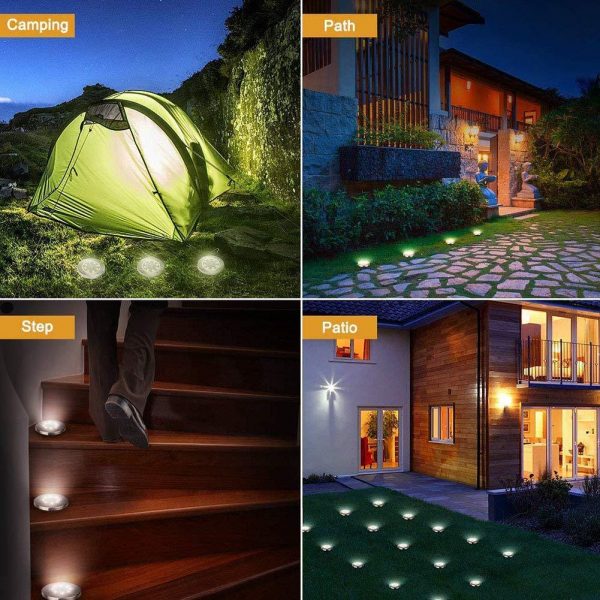
- Pathway Lights: These are low-level lights placed along walkways and paths to guide your steps. They’re perfect for adding both safety and style to your garden. I chose solar-powered pathway lights because they’re energy-efficient and easy to install without worrying about wiring.
- Spotlights: These are bright, focused lights used to highlight specific features in the garden, such as trees, statues, or architectural details. I used spotlights to draw attention to a beautiful old oak tree in my yard, making it a focal point even at night.
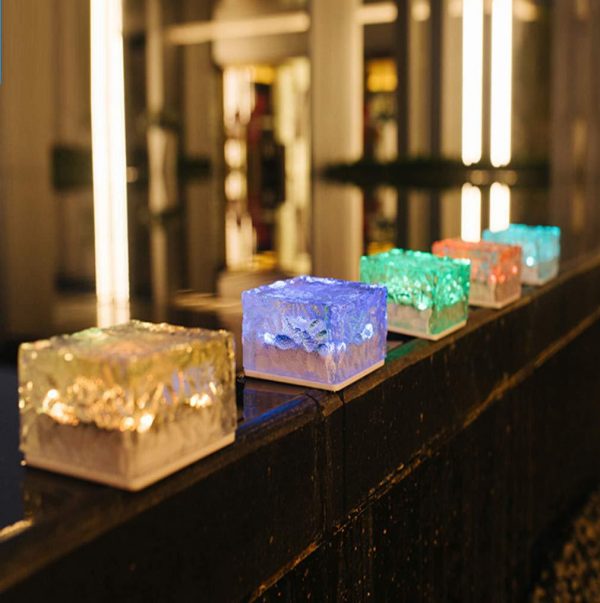
- String Lights: These lights are ideal for creating a festive and romantic atmosphere. They’re often used to drape over pergolas, around trees, or along fences. I loved the idea of string lights because they add a magical, twinkling effect to the garden.
- Floodlights: Floodlights are powerful, wide-beam lights used for illuminating large areas. They’re great for security purposes or for lighting up a large backyard. I installed a couple of floodlights near the entrance to my garden to ensure the area was well-lit for safety.
- Deck and Step Lights: These are small lights installed directly into deck boards or steps, providing subtle illumination that enhances safety and adds a modern touch. I added step lights to the stairs leading up to my deck, which not only made the steps safer but also added a sleek look.
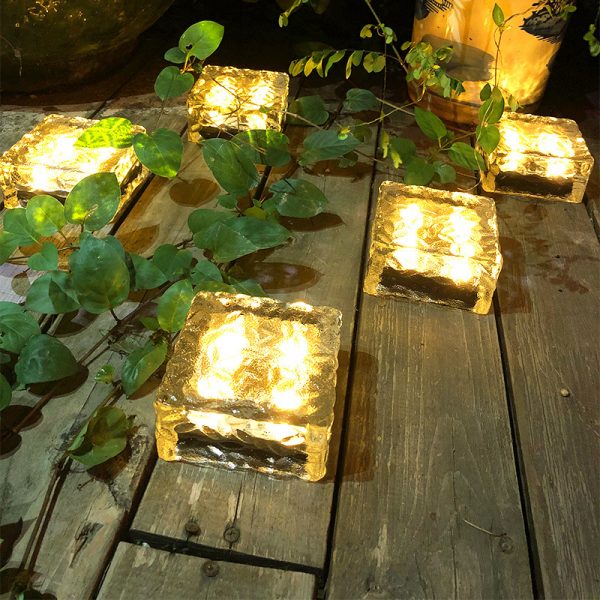
- Lanterns: Lanterns can be hung from trees, placed on tables, or positioned along walkways to add a charming, old-world feel to the garden. I found that lanterns were perfect for adding a cozy glow to my seating area.
- Wall Lights and Sconces: These are mounted on walls or fences to provide targeted lighting and enhance the architectural elements of your home. I placed sconces on the exterior walls of my house to create a warm and welcoming entryway.
Each type of light served a different purpose in my garden, and by mixing and matching them, I was able to create a layered lighting scheme that added depth and interest to the space.
Step 3: Choosing the Right Light Fixtures for Your Style
After deciding on the types of lights I needed, the next step was choosing the right fixtures. The style of the light fixtures plays a significant role in the overall aesthetic of the garden. I wanted my garden to have a cohesive look, so I made sure to choose fixtures that complemented the existing style of my home and outdoor space.
Here are a few tips I followed when selecting light fixtures:
- Match the Architectural Style: My home has a traditional, cottage-like feel, so I chose light fixtures with classic designs, like lantern-style pathway lights and wrought iron sconces. If your home has a more modern design, sleek, minimalist fixtures might be a better fit.
- Consider the Material: The material of the light fixtures is important for both aesthetics and durability. I opted for fixtures made from weather-resistant materials like stainless steel and aluminum, which can withstand the elements. For a more rustic look, copper or bronze fixtures are also great options.
- Think About Color and Finish: The color and finish of the fixtures should blend seamlessly with your garden’s design. I chose fixtures with a black finish because they contrasted nicely with the greenery in my garden without being too overpowering.
- Don’t Forget the Bulbs: The type of bulb you use can affect the light’s color temperature and brightness. I preferred warm white LED bulbs because they provided a soft, inviting glow that was perfect for creating a relaxing atmosphere.
By taking the time to choose the right fixtures, I was able to enhance the overall look of my garden while ensuring that the lights served their intended purposes.
Step 4: Planning the Layout of Your Garden Lighting
One of the most crucial steps in creating the best outdoor lighting scheme is planning the layout. It’s not just about placing lights randomly around the garden; it’s about strategically positioning them to achieve the desired effect. I took a methodical approach to planning the layout of my garden lighting, and it paid off.
Here’s how I planned my garden lighting layout:
- Start with a Walkthrough: I began by walking through my garden at dusk to get a sense of where lighting was needed. I took note of dark areas, pathways, and key features that I wanted to highlight.
- Create a Focal Point: Every garden should have a focal point, and lighting can help draw attention to it. For me, the large oak tree was the natural focal point. I positioned spotlights around the base of the tree to illuminate its branches and create a dramatic effect.
- Layer Your Lighting: To create a balanced and visually appealing lighting scheme, I layered different types of high-quality outdoor lights. Pathway lights provided the base layer, string lights added ambiance, and spotlights highlighted specific features. This layering approach added depth and dimension to the garden.
- Consider Safety: Safety was a top priority in my lighting plan. I made sure that all pathways, steps, and entry points were well-lit to prevent accidents. Floodlights and motion-sensor lights were strategically placed to enhance security.
- Avoid Light Pollution: I wanted to create a serene environment, so I was mindful of avoiding light pollution. I used lights with shields and directed beams downward to prevent unnecessary glare and keep the lighting focused on specific areas.
- Test and Adjust: After setting up the lights, I did a test run at night. This allowed me to see how the lights looked in the dark and make any necessary adjustments. I repositioned a few lights and added dimmers to control the brightness in certain areas.
By carefully planning the layout, I was able to create a well-lit garden that was both functional and beautiful. The lighting enhanced the natural beauty of the space and made it a place I wanted to spend time in after the sun went down.
Step 5: Deciding on Power Sources and Energy Efficiency
As much as I was focused on the aesthetics of my garden lighting, I also had to think about practicality, particularly in terms of power sources and energy efficiency. The last thing I wanted was a beautiful garden that came with sky-high energy bills.
Here are the options I considered:
- Solar-Powered Lights: Solar lights are an excellent option for garden lighting because they’re energy-efficient and easy to install. They don’t require any wiring, which makes them ideal for remote areas of the garden. I used solar pathway lights and found them to be both effective and eco-friendly. The only downside is that they rely on sunlight, so they may not be as bright on cloudy days.
- Low-Voltage Lighting: Low-voltage lighting is another energy-efficient option. These lights use a transformer to reduce the standard 120-volt electrical current to 12 volts, which is safer and more energy-efficient. I chose low-voltage spotlights and step lights because they provided consistent illumination without consuming too much energy.
- LED Bulbs: LED bulbs are a must for outdoor lighting because they’re energy-efficient and long-lasting. They use a fraction of the energy that traditional incandescent bulbs do and can last for years. I replaced all the bulbs in my garden lights with LEDs and noticed a significant reduction
Conclusion: Enhancing Your Garden with the Right Outdoor Lighting
Choosing the perfect outdoor lighting for your garden is a rewarding process that can transform your outdoor space into a beautiful, functional, and safe environment. By considering the purpose of your lighting, exploring different types of lights, selecting the right fixtures, planning the layout, and focusing on energy efficiency, you can create a garden that shines both day and night.
If you’re looking for top-quality garden lighting options that cater to various styles and needs, I highly recommend visiting the Bestgarden store. They offer a wide range of lighting solutions that can help you achieve the perfect look for your garden. Whether you’re looking for elegant path lights, powerful spotlights, or charming string lights, Bestgarden has something for everyone. Illuminate your garden and enjoy your outdoor space like never before!